Here is one of my slides from a talk on 23ai where I reference the limits on the free edition of our database. These limits apply to all of our current Express Edition database types, from 18c, 21c and now 23ai.

Looking at each of these in turn, it is easiest to start from the bottom because obviously there is no issue with the number of pluggable databases 😀. Next when we look at CPU and RAM, these are surprisingly not as restrictive as you might first think. With the ever increasing power of modern CPUs and the speed increases in RAM and solid-state storage, you can achieve an astonishing amount of workload with just 2G RAM and a couple of CPU threads. For example, I loaded up the Swingbench order entry schema into a 23ai FREE edition database, running inside a VM, on my 5 year old desktop machine, and even with the CPU/RAM restrictions and all of those layers, I can still push out nearly 500 transactions per second!

Am I going to run the world’s stock markets on this? No, but there is an enormous volume of departmental applications running on APEX out there that will never come close to needing 500 TPS..
So that just leaves the disk space restriction of 12GB. That is probably the limit you will hit before anything else, so the question becomes: How do we configure our free edition database to squeeze every last drop out of that 12GB? To guide you through this, I’ll start with a fresh install of the free edition so you can follow along the steps from “ground zero” to your new turbo-charged free database edition.
First we’ll get the software installed
[root@db21oel8 sf_tmp]# dnf install -y oracle-database-free-23c-1.0-1.el8.x86_64_fresh.rpm
Last metadata expiration check: 2:03:20 ago on Fri 15 Dec 2023 03:13:22 EST.
Dependencies resolved.
=======================================================================================================================================
 Package                                     Architecture              Version                   Repository                       Size
=======================================================================================================================================
Installing:
 oracle-database-free-23c                    x86_64                    1.0-1                     @commandline                    1.6 G

Transaction Summary
=======================================================================================================================================
Install  1 Package

Total size: 1.6 G
Installed size: 4.0 G
Downloading Packages:
Running transaction check
Transaction check succeeded.
Running transaction test
Transaction test succeeded.
Running transaction
  Preparing        :                                                                                                               1/1
  Running scriptlet: oracle-database-free-23c-1.0-1.x86_64                                                                         1/1
  Installing       : oracle-database-free-23c-1.0-1.x86_64                                                                         1/1
  Running scriptlet: oracle-database-free-23c-1.0-1.x86_64                                                                         1/1
[INFO] Executing post installation scripts...
[INFO] Oracle home installed successfully and ready to be configured.
To configure Oracle Database Free, optionally modify the parameters in '/etc/sysconfig/oracle-free-23c.conf' and then run '/etc/init.d/oracle-free-23c configure' as root.

/sbin/ldconfig: /etc/ld.so.conf.d/kernel-5.4.17-2102.201.3.el8uek.x86_64.conf:6: hwcap directive ignored

  Verifying        : oracle-database-free-23c-1.0-1.x86_64                                                                         1/1

Installed:
  oracle-database-free-23c-1.0-1.x86_64

Complete!
And we’ll build the free edition database. Note – we are not going to use this database, we are just going through the complete installation process to ensure that everything on the host is correctly configured for subsequent changes we will be making.
[root@db21oel8 sf_tmp]# /etc/init.d/oracle-free-23c configure
Specify a password to be used for database accounts. Oracle recommends that the password entered should be at least 8 characters in length, contain at least 1 uppercase character, 1 lower case character and 1 digit [0-9]. Note that the same password will be used for SYS, SYSTEM and PDBADMIN accounts:
Confirm the password:
Configuring Oracle Listener.
Listener configuration succeeded.
Configuring Oracle Database FREE.
Enter SYS user password:
****
Enter SYSTEM user password:
*****
Enter PDBADMIN User Password:
*****
Prepare for db operation
7% complete
Copying database files
29% complete
Creating and starting Oracle instance
30% complete
33% complete
36% complete
39% complete
43% complete
Completing Database Creation
47% complete
49% complete
50% complete
Creating Pluggable Databases
54% complete
71% complete
Executing Post Configuration Actions
93% complete
Running Custom Scripts
100% complete
Database creation complete. For details check the logfiles at:
 /opt/oracle/cfgtoollogs/dbca/FREE.
Database Information:
Global Database Name:FREE
System Identifier(SID):FREE
Look at the log file "/opt/oracle/cfgtoollogs/dbca/FREE/FREE.log" for further details.

Connect to Oracle Database using one of the connect strings:
     Pluggable database: db21oel8.localdomain/FREEPDB1
     Multitenant container database: db21oel8.localdomain
Next up, we are going to delete this database! That’s right, it is of no use to us because it is setup to handle the 99% of typical use cases out there, namely, learning about the database, using it for CI/CD and the myriad of other potential cool things you can do with a free Oracle database. But we are aiming for maximize the storage potential here, so we’ll be building this database again from scratch.
Important Note: If you are currently already using your free database, make sure you take a DataPump export of your entire database before you delete your database! (Because I imagine you will want to reload your database once you have taken the steps below!)
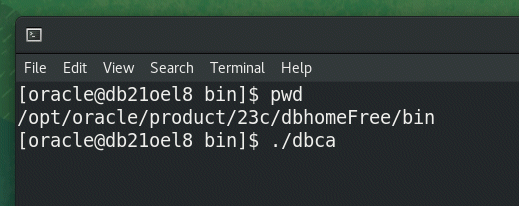
Fire up a new terminal, head into $ORACLE_HOME/bin and launch ‘dbca’.
(Yes, all of this can be done without invoking the GUI, but since we’re doing something drastic here, I’m opting for the GUI to make sure no-one loses their database by accident!)
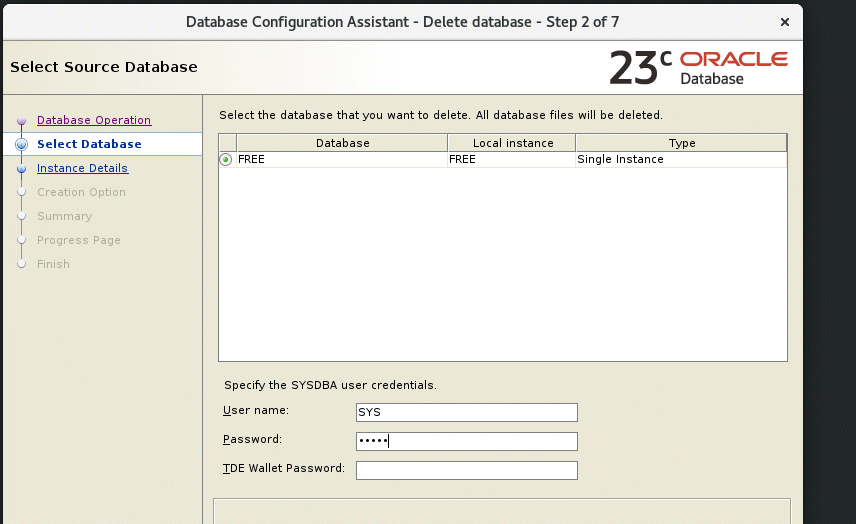
Choose “Delete Database”

Because this is the free edition, there will only be one database to choose and it will be named FREE. Enter your SYS password and continue to accept the default prompts until your database is deleted forever!
Important Note: See the important note above before clicking that final confirmation! 😀
Now we are going to recreate this database, but before you do so, head over to my git repo and download the “XE_bigfile.dbt” template file. Transfer that file to your database host and copy it into the $ORACLE_HOME/assistants/dbca/templates folder like below. We are going to use that template to build a new version of the free database. Then fire up “dbca” again from $ORACLE_HOME/bin.

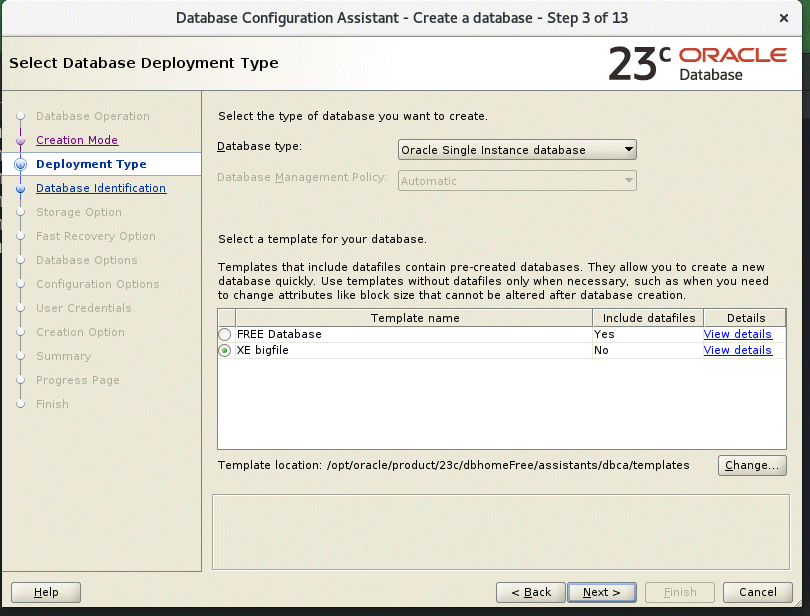
This time we are going to create a new database.

Do not choose “Typical Configuration”. Instead, click Advanced and move to the next screen.

Notice that there is now a new template option for creating the database. This is due to the existence of the template file we copied into place before running “dbca”. Make sure you choose “XE bigfile” before moving to the next screen.
Even though the next screen prompts us for the database name, the only name allowed for the database free edition is FREE, so don’t change anything here and move to the next screen.

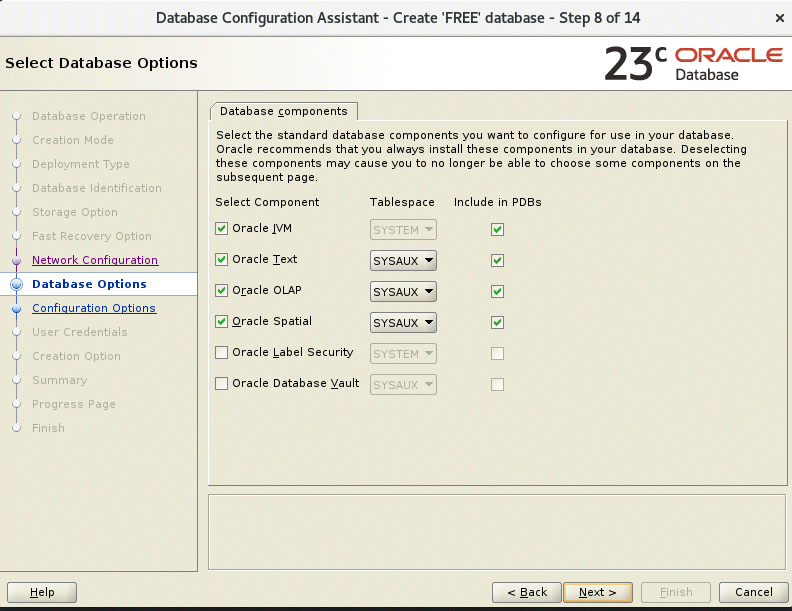
Here is where you decide on what you features you do (or do not) want in your free edition database. Each option you choose will consume a little bit of SYSAUX space, so if you are concerned about that, you can de-select options but we will be taking some steps later to ensure our SYSAUX never grows out of control anyway. So if you think you might need any of these options, I’d recommend you may as well keep them selected for now.
The memory parameters are fixed at the limit of 2G so don’t change of those before moving to the next screens (in which you just need to go with the defaults, perhaps with the exception of archive logging if you need it).

Eventually you will be off and creating your brand new free edition of the database with the new template. Note that it will take a lot longer than the standard free edition installation because we are creating the database from scratch rather than seeding the database from an existing copy. So grab a coffee and check back from time to time until it has completed.

Once the creation is done, if you connect to the database in either the root container or in the PDB, you’ll see that the tablespaces are all created as BIGFILE.


That might seem confusing, after all, we talking about a small database where with a total size limit of 12G. However, I’d strongly recommend you check out my previous post explaining why BIGFILE tablespaces are essential for any database that has a size restriction. (TL;DR: You get access to the “alter tablespace shrink” command in 23ai!).
At this point, we have a FREE edition database that (other than having BIGFILE) seems no different to the standard installation. Now we made to take some measures to ensure we can maximize the “bang for our buck” on that 12GB of space. I’ll so though each option you could consider in turn below
1) The SYSAUX threat
The SYSAUX tablespace should not typically grow to an excessive size, but if it does then you could be for some challenges, because if its datafile grows to over 12G then there is a chance you will not be able to open your database. (This is also one of the reasons it is critical to have your tablespaces defined as BIGFILE)
Here are some steps to consider to ensure that your SYSAUX never gets into dangerous territory
a) We’ll move audit information into its own tablespace
create tablespace audit_trail
datafile '/opt/oracle/oradata/FREE/FREEpdb1/audit01.dbf' size 20m
autoextend on next 2m;

begin
dbms_audit_mgmt.set_audit_trail_location(
   audit_trail_type=>dbms_audit_mgmt.audit_trail_aud_std,
   audit_trail_location_value=>'AUDIT_TRAIL');
end;
/

begin
dbms_audit_mgmt.set_audit_trail_location(
   audit_trail_type=>dbms_audit_mgmt.audit_trail_fga_std,
   audit_trail_location_value=>'AUDIT_TRAIL');
end;
/
begin
dbms_audit_mgmt.set_audit_trail_location(
   audit_trail_type=>dbms_audit_mgmt.audit_trail_db_std,
   audit_trail_location_value=>'AUDIT_TRAIL');
end;
/
begin
dbms_audit_mgmt.set_audit_trail_location(
   audit_trail_type=>dbms_audit_mgmt.audit_trail_unified,
   audit_trail_location_value=>'AUDIT_TRAIL');
end;
/
b) We will use aggressive settings for logs and retentions (alter these to however you see fit) so that we do not get excessive growth of the historical tables in SYSAUX.
exec dbms_workload_repository.modify_baseline_window_size(window_size =>7);
exec dbms_workload_repository.modify_snapshot_settings(retention=>7*1440);

exec dbms_stats.alter_stats_history_retention(7);
exec dbms_scheduler.set_scheduler_attribute('log_history',7);

begin
dbms_audit_mgmt.set_last_archive_timestamp(
   audit_trail_type=>dbms_audit_mgmt.audit_trail_unified,
   last_archive_time=>sysdate-7);
end;
/
c) Assuming you are using APEX, it will be installed into its own tablespace not in SYSAUX
When you download APEX, the default installation instructions use SYSAUX for installation, ie
@apexins SYSAUX SYSAUX TEMP /i/
Instead use a tablespace specific for APEX
create bigfile tablespace apex231
datafile '/opt/oracle/oradata/FREE/FREEpdb1/apex231.dbf' size 20m
autoextend on next 20m maxsize 3g
and then install into this tablespace with:
@apexins APEX231 APEX231 TEMP /i/
Each version of APEX goes into its own tablespace, hence when you go to 23.2 you would have a new tablespace for that, and once upgraded, drop the apex231 one and so forth. That way you never have fragmented holes in your SYSAUX tablespace that might no be fillable (and thus the datafile grows).
2) Compress everything
As mentioned at the start of this post, CPU is probably the resource you can spare with your free edition. In order to get more space, we can sacrifice a little CPU to compress everything in the database. For each tablespace you intend to store data into, you can alter the defaults for that tablespace to automatically use compression, eg
alter tablespace USERS
default table compress for oltp
index compress advanced low;
This ensure that tables created without a compression clause will pick up the defaults from the tablespace level. You can then ensure that indexes will also pick up the tablespace default by setting the following parameter:
alter system set db_index_compression_inheritance = TABLESPACE scope=both;
Note: It is your responsibility to ensure that no-one explicitly specifies NOCOMPRESS on their DDL. If you previously unloaded your data in readiness for reload back into this new database, make sure you import without any existing compression clauses, eg
impdp transform=storage:n …
And now get to sit back and bask in your new awesome free database with its optimal storage configuration. Also, because all of your tablespaces are now defined as BIGFILE, if there comes a time where your tablespaces are growing close to the free database capacity limit but they have some free space fragments below the high water mark, then you can reclaim that space easily with “alter tablespace shrink” as outlined in my previous post. The only time you should end up near 12GB of space allocated is when you genuinely have 12GB of compressed data.
But what if you need more?
If even after eliminating any free space wastage and compressing your data, you still need more space, I’d perhaps suggest its time to look at using our free database on Autonomous which has an even more generous allocation, or look at Standard Edition. But if those are not options for you and you still need more space, a couple of thing you could look at are:
1) The “daisy chain”
You’re allow one copy of XE/FREE per machine, but there is of course nothing to stop you from having multiple machines. You could shift older, rarely used data into a second XE/FREE instance on a second machine, and access it via database link from the “primary” instance.
2) Hybrid partitions
A similar strategy for old read-only data is to use hybrid partition tables, so that the (read only) old data is unloaded to flat file, and therefore no longer contributes to database space allocation
In either case, this typically needs some application awareness to handle this, but for read-only historical data, it might be worth exploring.


Got some thoughts? Leave a comment